How To Fish The Neko Rig
Have you ever wondered if there’s a way to give yourself an extra edge while fishing? Guess what? There is. It’s called the Neko Rig, and I’m going to walk you through why this clever setup can be a game-changer for your fishing expeditions.
While the Neko Rig might not be ancient angling knowledge, it has certainly carved out its spot in the modern angler’s arsenal. Originating in Japan, the rig has made a splash across the globe for its subtlety and efficiency. You’re going to find out about its inception and how it has evolved into the tactic it is today.
This isn’t just about tying a worm on a hook; it’s also about presenting your bait in a way that’s irresistible to fish. The Neko Rig offers just that – a novel approach to lure bass and other species in with a movement that mimics natural prey. And better yet, I’ll be sprinkling in some visual content so you can see just what a proper Neko setup looks like.
I’m here to help you understand the basics and master the use of this rig. By the time we roll into the next section, you’ll be primed with the practical know-how to start assembling your own Neko Rig, gear up, and get ready to cast with confidence.
The Anatomy of the Neko Rig: Components and Setup
If you want to succeed with a Neko Rig, knowing its anatomy is the first step. This setup is brilliantly simple yet exceptionally versatile, making it a go-to for savvy anglers.
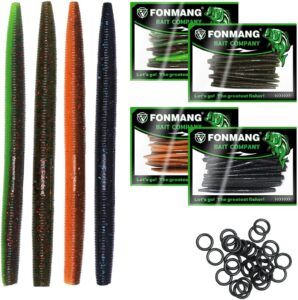
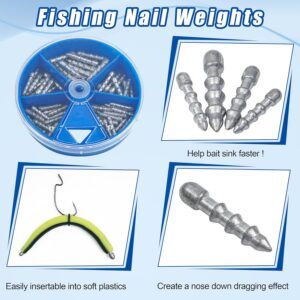
Let’s break it down. The Neko Rig is primarily composed of a soft plastic worm, a specialized or offset hook, and a nail weight or a screw-in weight. Selection of the right type of components are crucial for the effectiveness of the rig.
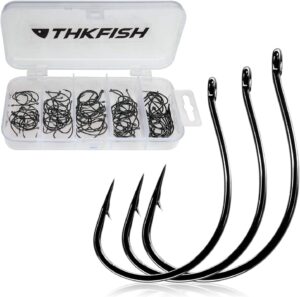
For hooks, an offset worm hook ranging from size 1 to 2/0 is typically ideal for this application. When it comes to weights, you have the freedom to adjust based on depth and desired fall rate, but a range of 1/32 to 1/8 ounce nails or screw weights are commonly used.
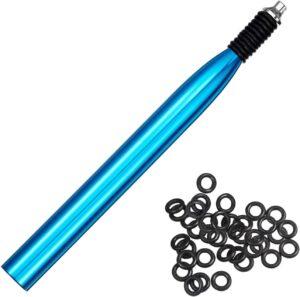
Now, for setting up the Neko Rig, you’ll thread the weight into one end of the worm – which will be the head. The position of the hook is what sets the Neko apart; you’ll need to insert it perpendicular to the worm body closer to the weighted end, allowing for that enticing, seductive fall that piques a fish’s curiosity. You can hook thru the body of the worm or for better and long lasting use of your worm you can addd two orings as shown below. The use of the orings secures your hook to the worm better for better hookups and saves the soft plastics from being ripped off the hook. I will add some links to the tackle to be used at the end of this post.
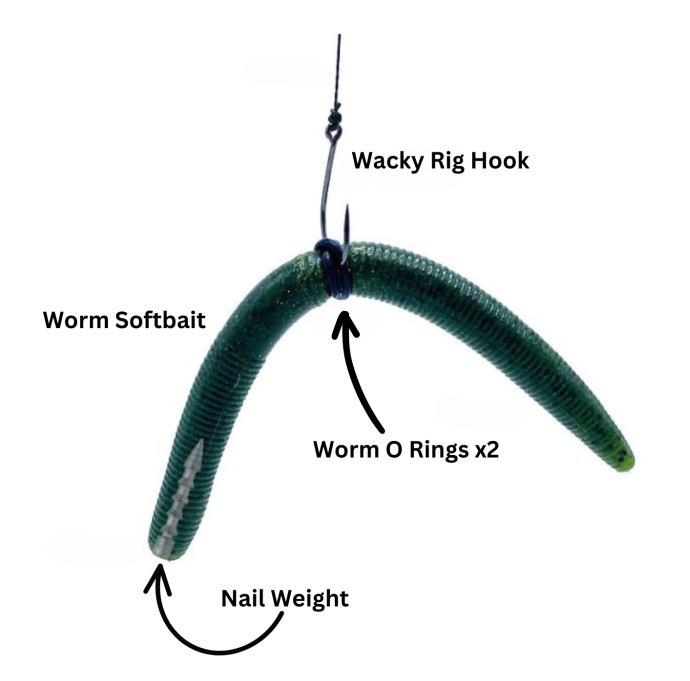
This is the spot for a clear, step-by-step visual guide on assembling your Neko Rig. Choose something that resonates with you – a bright-colored worm for visibility, or a more natural coloration that blends with the local forage.
Here is an excellent video from Tim Little from Tactical Bassin who goes thru the rundown on the neko rig:
Ready to put your rig into action? The next section will guide you through the nuanced dance of casting and retrieving the Neko Rig to ensure you’re set for success.
Casting the Neko Rig: Techniques and Tips for Success
Getting your Neko Rig out into the water isn’t just a matter of flinging it as far as possible and hoping for the best. There’s a finess to it, and I’m here to help you nail it down. You’re going to find out how to cast effectively, manage your retrieve, and present your bait to make those fish practically leap onto your hook.
First off, your casting technique is crucial. I recommend a smooth, controlled overhead cast to avoid spooking fish. Precision matters here because you’ll want your Neko Rig to land softly, mimicking natural prey. Pay attention to where the fish are likely to be, such as structures, drop-offs, or weed lines, and aim there.
Once your rig hits the water, it’s all about the retrieve. A slow, steady twitch can be irresistible to bass. The weighted head of the Neko Rig causes the tail of the worm to stand up off the bottom, which proves incredibly enticing. It’s all about making your bait act like something a fish can’t resist.
Remember, the type of line and rod you use can significantly impact your casting and retrieve. For the Neko Rig, a medium-light to medium-power rod with fast action is ideal. It gives you the required sensitivity to feel the bite and the backbone to set the hook properly. Braided lines with a fluorocarbon leader are generally your best bet for the feel and the stealth.
Stick around, because up next, I will walk you through where and when to deploy the Neko Rig, ensuring you’re at the right place at the right time to maximize your fishing trips. Choosing the right fishing spots is essential, and I’ll make sure you’re armed with all the knowledge to make the best call.
Where and When to Fish the Neko Rig: Maximizing Your Chances
If you’re looking to get the most out of your Neko Rig, knowing where and when to cast is just as crucial as the setup. The Neko Rig, versatile as it is, thrives in particular scenarios that accentuate its sneaky presentation and finesse approach.
Looking for the right spot? Target areas with structure. Submerged trees, brush piles, and docks are good starting points. You’ll also find success near drop-offs and transition zones where different depths and bottoms meet – think where the sand turns to rock or where grass lines end. These are fish highways, and the Neko Rig is your toll collector.
The rig’s performance is subject to shifting seasons. SPRING brings active fish that are eager for a slow-moving snack, making it prime time for Neko Rigging. SUMMER calls for a bit more finesse, as fish might be more lethargic and hang closer to cool structures. AUTUMN, with its falling temperatures, triggers a feeding frenzy as fish bulk up for winter – perfect for your Neko Rig. In WINTER, go slow. Fish are slow, so your Neko should mirror that lethargy, often with smaller movements and longer pauses.
Among the other seasonal factors, consider the weather patterns too. Overcast days or periods following a rainstorm can increase fish activity, making them more likely to strike a well-presented Neko Rig.
Now, you’re not just throwing your Neko Rig into the water hoping for a bite; you’re strategically placing it where fish live and eat. This isn’t just about getting lucky; it’s about making your own luck with knowledge and the right technique.
The Neko Rig Versus the Wacky Rig: Spotting the Similarities and Differences
Alright, let’s wrap things up with a side-by-side look at the Neko and Wacky Rigs. These two methods have their fans, and it’s easy to see why. Both rigs play an impressive game underwater, enticing fish with their life-like movements.
The Neko Rig, with its weighted end, has that nose-down stance that imitates a feeding baitfish. This can be deadly effective, especially when fish are hugging the bottom. It’s also great for deeper water or when you’re dealing with a bit of current.
Flip the script to the Wacky Rig, and you’ve got a center-weighted setup that wiggles alluringly on both ends during the fall. It’s a classic choice in shallower waters or when the fish are suspended.
If you want to, you can switch between the two based on where the fish are and what they’re doing. Fish the Neko Rig when you need that targeted bottom bounce, and switch to the Wacky Rig to cover more water column and mimic different prey movements.
Mastering these rigs isn’t just about expanding your fishing tactics; it’s about understanding the underwater world from the perspective of the fish. Choose something that resonates with you and the conditions you’re facing, and go from there.
Remember, your first attempt doesn’t need to be your last. You can always adjust your approach down the road. What matters is getting out there, trying new things, and honing your skills.
I really hope that this deep dive into the Neko Rig has equipped you with knowledge and tips to reel in your next big catch. And hey, next time you’re out on the water, why not share your own Neko Rig success stories? I’d love to hear how it goes – leave your comments and stories below!
PS: As noted here is link to some tackle to get you started on your neko rig:
